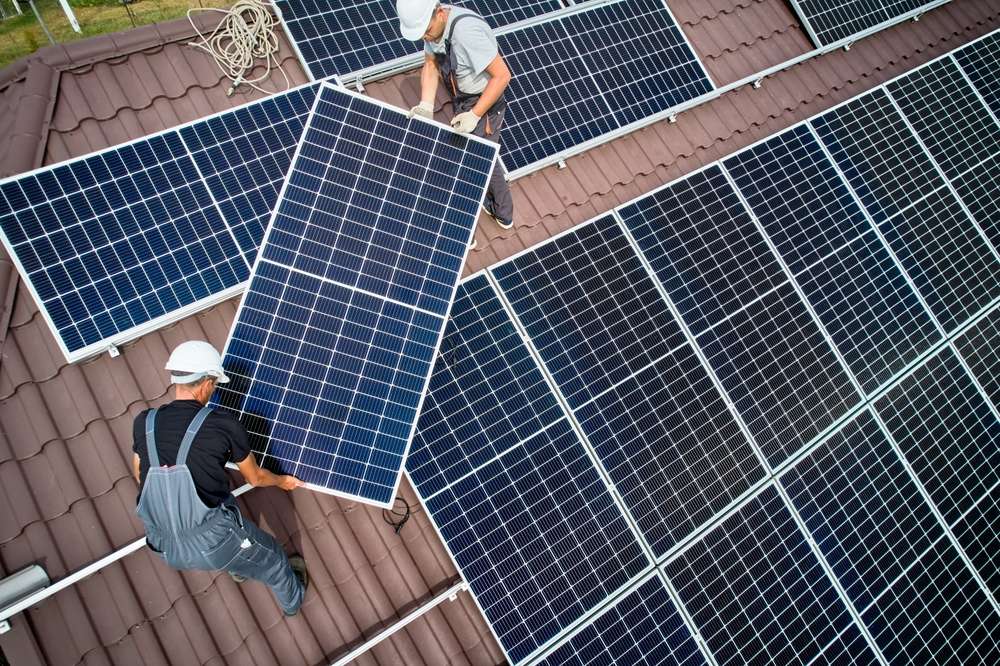
Learn How Solar Panel Installation Works ☀️
Thinking about adding solar panels to your home? Learn how solar panel installation works, what materials are needed, and how to maintain an efficient system. Understand the benefits of solar energy and the key steps for safe and effective installation.

What Is the Step-by-Step Solar Panel Installation Process?
The step-by-step solar panel installation process begins with a thorough site evaluation. A professional installer assesses your roof’s condition, orientation, and shading patterns to determine optimal panel placement. They measure available space and calculate the system size needed to meet your energy goals. Next comes the permitting phase, where installers submit plans to local authorities and your utility company for approval. This can take several weeks depending on your location.
Once permits are secured, the physical installation begins. Installers mount racking systems to your roof, ensuring they’re securely anchored to structural beams. These racks provide the framework that holds solar panels in place. Panels are then carefully positioned and connected in series or parallel configurations depending on your system design. Wiring runs from the panels to an inverter, which converts direct current into alternating current for household use. Finally, the system connects to your electrical panel and utility meter, often requiring a final inspection before activation.
How Solar Panels Convert Sunlight Into Power
Understanding how solar panels convert sunlight into power reveals the technology behind this renewable energy source. Solar panels contain photovoltaic cells made from semiconductor materials, typically silicon. When sunlight strikes these cells, photons knock electrons loose from their atoms, creating an electrical current. This phenomenon, called the photovoltaic effect, generates direct current electricity.
The direct current flows from the panels through wiring to an inverter, a critical component that transforms DC power into alternating current electricity compatible with home appliances and the electrical grid. Modern systems often include microinverters attached to individual panels or string inverters that handle multiple panels together. Smart monitoring systems track energy production in real time, allowing homeowners to see exactly how much power their system generates throughout the day. Any excess electricity can feed back into the grid, potentially earning credits through net metering programs offered by many utility companies.
Tools and Materials Needed for Solar Setup
A professional solar installation requires specialized tools and materials needed for solar setup to ensure safety and efficiency. Essential equipment includes mounting rails and brackets designed to withstand local weather conditions, stainless steel bolts and fasteners that resist corrosion, and weatherproof sealants to prevent roof leaks. Installers use power drills, torque wrenches, and wire strippers for precise assembly work.
Electrical components form the heart of the system. Besides the panels themselves, installers need junction boxes, conduit for protecting wiring, circuit breakers, and disconnect switches for safety. The inverter must match the system’s voltage and wattage specifications. Grounding equipment protects against electrical surges and lightning strikes. Professional installers also rely on safety gear including harnesses, non-slip footwear, hard hats, and insulated gloves. Measuring tools like laser levels and inclinometers ensure panels are positioned at optimal angles for maximum sun exposure throughout the year.
Safety Tips for Installing Solar Panels
Following safety tips for installing solar panels protects both installers and homeowners from potential hazards. Working on rooftops presents fall risks, so proper fall protection equipment is mandatory. Professional installers use harness systems anchored to secure points and maintain three points of contact when moving across roof surfaces. They avoid installation during wet or windy conditions when surfaces become slippery and materials harder to control.
Electrical safety is equally critical. Installers must de-energize circuits before making connections and use insulated tools rated for the voltage levels involved. They verify all connections are secure and properly grounded before energizing the system. Sun exposure creates another concern during installation work. Crews schedule breaks, stay hydrated, and use sunscreen to prevent heat-related illness. Homeowners should keep clear of the work area and never attempt DIY installation without proper training and certification. Most jurisdictions require licensed electricians to handle grid connections, and insurance policies may not cover damage from unpermitted work.
Maintenance and Care for Solar Systems
Proper maintenance and care for solar systems ensures long-term performance and maximizes your investment. Solar panels require surprisingly little upkeep compared to other home systems. Rain naturally washes away most dust and debris, but panels in dry climates or near construction sites may need occasional cleaning. Use a soft brush or squeegee with plain water, avoiding abrasive materials or harsh chemicals that could scratch protective coatings.
Regular monitoring helps identify performance issues early. Check your system’s output monthly through monitoring apps or inverter displays. Significant drops in production may indicate shading from new tree growth, panel damage, or inverter problems. Most manufacturers recommend professional inspections every few years to verify electrical connections remain tight, mounting hardware stays secure, and no water damage has occurred. Inverters typically need replacement after 10 to 15 years, while panels themselves often carry 25-year performance warranties. Trim nearby vegetation to prevent shading and keep ventilation clear around inverters to prevent overheating.
What to Expect After Installation
After installation completes and inspections pass, your utility company installs a bidirectional meter that tracks both electricity consumption and solar generation. Your system begins producing power immediately during daylight hours, reducing the amount you draw from the grid. Most homeowners notice significant drops in their electricity bills within the first billing cycle.
Monitoring your system’s performance becomes part of your routine. Modern systems provide detailed data showing hourly production, weather impacts, and lifetime energy generation. You’ll learn your home’s energy patterns and may adjust usage to maximize solar benefits, running appliances during peak production hours when possible. Many systems include battery storage options that capture excess daytime production for evening use, increasing energy independence. Understanding your system’s capabilities helps you make the most of your solar investment while contributing to a cleaner energy future.


